

Just finished grandson's summer wardrobe so taking a 'clothing break' to make a new cover for my ironing board.


I don't have a whole lot of "instructions" for this project because really, all I did was take apart the old one, repurpose some of it and used it to create a paper pattern for the main piece and the small piece underneath at the narrow end.

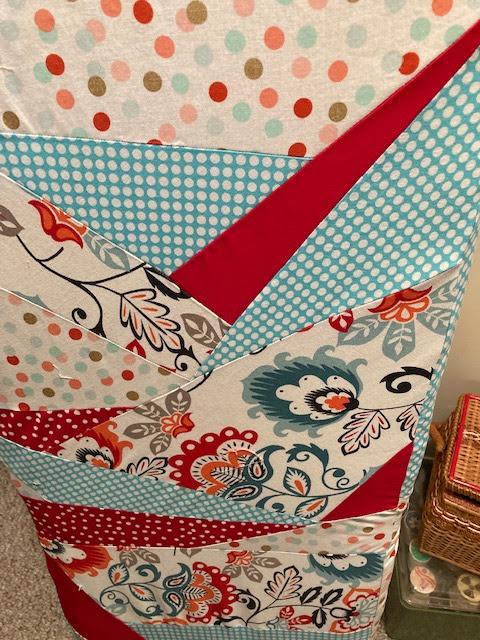
Once I had the pattern pieces cut, I was ready to dig into my scrap stash to create a patchwork top. I am not a quilter so my technique is rather 'haphazard' but it works.

I simply found fabrics that coordinated and began cutting and stitching them in random ways. Once I got a few stitched together, I'd use the rotary cutter to create a straight edge and continue adding. I just kept building until I had enough fabric to cover the top of the board.

I laid the paper pattern on the fabric I created and cut leaving about a half inch seam allowance.

I cut a piece for the narrow end, underneath and then created a side panel that was 2.5" wide and 90" long. I just cut lengths at random and serged them together, creating the long edge piece and then attached both to the top, following the original board cover as my pattern.

Again, using the original cover, I saw that they had created a casing of seam binding to insert the elastic and cording into so I did the same and inserted 1/4" elastic in, pulling to adjust the fit. Note that I did not add a cord inside like the original - there was just no need for it as the elastic was snug and provided a great fit to the board.

I cut out the two layers of padding from the old board instead of buying new . . . no one will see it and it was perfectly 'puffy'. I also had to remove that rubber iron pad to do this which was fine . . . I didn't like it on my other cover and while I could have added it to this cover, I chose to toss it. The old cover had these nice, velcro straps to go underneath and keep the cover secure so I kept those and attached to my new cover.

Here she is - looking brand new and it cost me nothing to make!
I really love how this turned out and that I was able to use up almost all of these scraps from previous projects!

You are so clever! What a fun and unique ironing board cover! 😀
ReplyDeleteOooh this is so pretty! This will make your ironing jobs more cheerful! Thanks for the tutorial...my ironing cover is in need of a refresh...so maybe?
ReplyDeleteI love it, Lauren!! I should do this, too. Thanks for the inspiration. Happy first week of Springtime!
ReplyDeleteSuch a great project! I haven't had a 'real' ironing board for years and have relied on an ironing pad on my desktop. It works, but not as well as a real ironing board. Luckily, when we cleaned out my friends home, I 'inherited' her board and hadn't realized how much I missed having one.
ReplyDeleteWhat a nice way to use up fabric scraps! And it looks bright and cheerful too. :)
ReplyDeleteI love this!
ReplyDelete