Sunday, March 20, 2022

Ironing Board Cover - Scrap Buster Project


Just finished grandson's summer wardrobe so taking a 'clothing break' to make a new cover for my ironing board.  


What do you think?  Is it time???

I don't have a whole lot of "instructions" for this project because really, all I did was take apart the old one, repurpose some of it and used it to create a paper pattern for the main piece and the small piece underneath at the narrow end.


Once I had the pattern pieces cut, I was ready to dig into my scrap stash to create a patchwork top.  I am not a quilter so my technique is rather 'haphazard' but it works.


I simply found fabrics that coordinated and began cutting and stitching them in random ways.  Once I got a few stitched together, I'd use the rotary cutter to create a straight edge and continue adding. I just kept building until I had enough fabric to cover the top of the board.

I laid the paper pattern on the fabric I created and cut leaving about a half inch seam allowance.  


I cut a piece for the narrow end, underneath and then created a side panel that was 2.5" wide and 90" long.  I just cut lengths at random and serged them together, creating the long edge piece and then attached both to the top, following the original board cover as my pattern.


Again, using the original cover, I saw that they had created a casing of seam binding to insert the elastic and cording into so I did the same and inserted 1/4" elastic in, pulling to adjust the fit.  Note that I did not add a cord inside like the original - there was just no need for it as the elastic was snug and provided a great fit to the board.


I cut out the two layers of padding from the old board instead of buying new . . . no one will see it and it was perfectly 'puffy'.  I also had to remove that rubber iron pad to do this which was fine . . . I didn't like it on my other cover and while I could have added it to this cover, I chose to toss it.  The old cover had these nice, velcro straps to go underneath and keep the cover secure so I kept those and attached to my new cover.


Here she is - looking brand new and it cost me nothing to make!
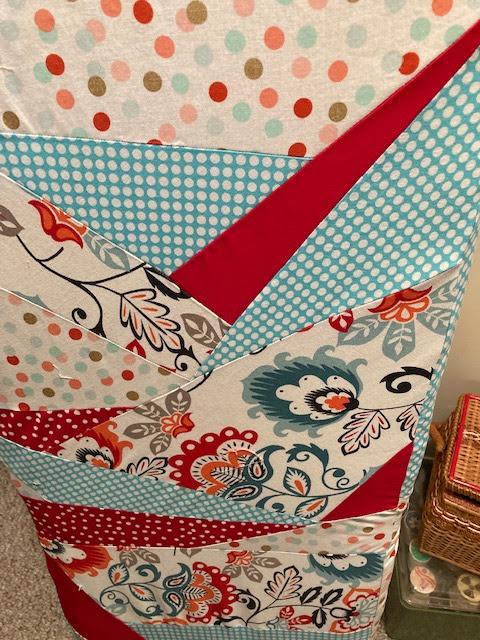

I really love how this turned out and that I was able to use up almost all of these scraps from previous projects!




Thursday, December 9, 2021

Vintage Sleeve Board Make Over


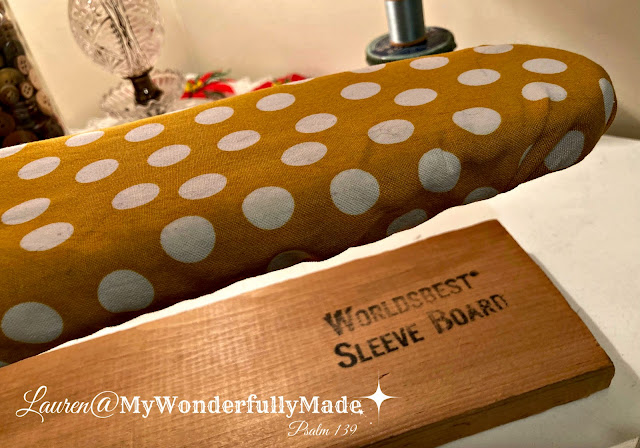
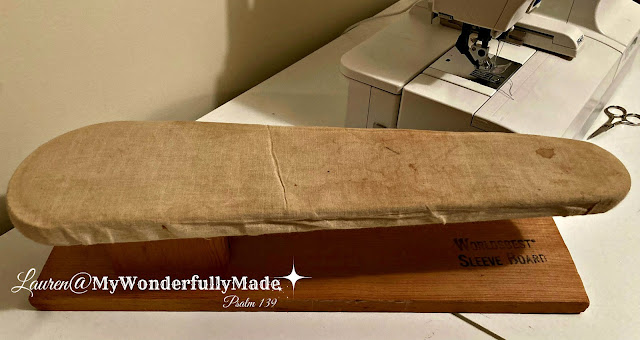
How many of you know what this is?  I remember seeing my mom use this every week as she ironed shirts.  If you look closely the base tells you . . . it's a Worldsbest Sleeve Board.  You know, in the "old days" when people actually ironed shirts, you didn't want a crease in the sleeve so you'd slip it onto this board and get nice, neatly pressed sleeves.

These days I use mine for pressing little boy outfits that I sew for my grandson.  


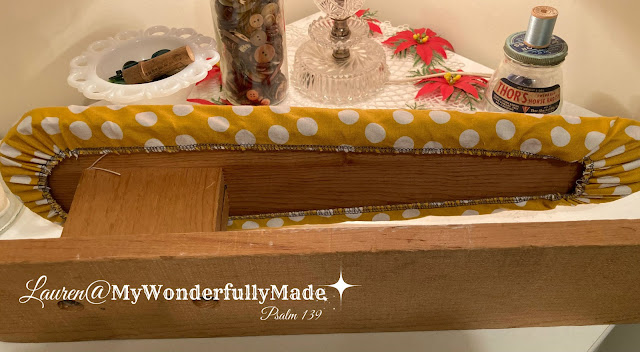
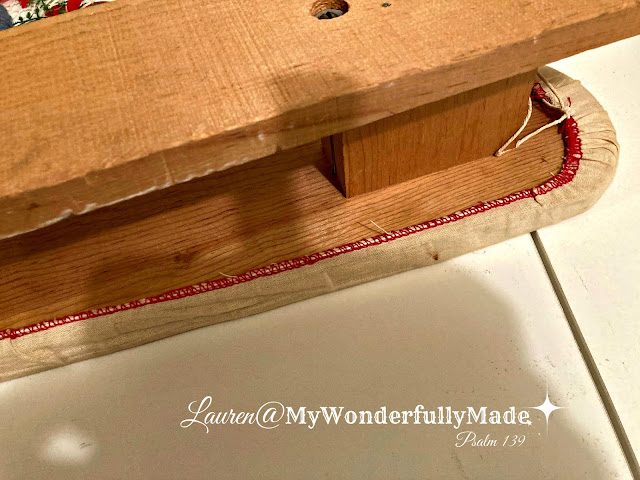
I had a cheapo metal one I'd bought years ago when my kids were little but this solid beauty came from my parents' house.  Looking at the cover, I thought this was a genius way to gather the fabric!  There is a piece of string threaded through the serged edge!


I used the original cover to cut a new one and then serged the edges.  I would think you could also do a wide zig-zag stitch if you didn't have a serger.  Using a tapestry needle I threaded the new string all the way around.


I also added a new layer of fleece padding on top before putting the new cover on.


Here she is  . . . all spiffed up and ready for another 60 years!


I'm going to attempt to be less of a delinquent blogger but no promises for 2022 haha!  My days are filled with work, LOTS of sewing for my little grandson and even myself from time to time and traveling as often as possible to visit him! 

I still enjoy reading other blogs (how DO you all keep them up so frequently!!??) and am wishing everyone a most blessed Christmas 2021!


Sunday, May 30, 2021

Summer Tank from Vintage Pillow Cases


I love vintage linens.  I mean REALLY love them. I have amassed a fairly large collection, mostly from estate sales. I am always drawn to the intricate, beautiful, embroidery and trims that once were part of everyday life as bed linens, dish towels, tablecloths, handkerchiefs and napkins.  While I DO use them for what they were intended, I wanted to find some ways to use them for other purposes, including clothing.  Just look at the crochet work on these cases I've had for a long time. Look at that beautiful detail!


These cases were in pristine condition but some you come across may have stains on them.  Sometimes you can use parts of them but if you want to use the whole item, there are lots of options for trying to remove the stains. Bleach is NOT one of them.  This can disintegrate and damage especially very old linens. BIZ laundry detergent and Hydrogen Peroxide are two methods I've used with great results.  Since these were clean with no stains, I was able to use them just like a piece of fabric.

Before cutting (or even choosing a pattern) you have to visualize how you're going to use the linen piece. In this case I knew the crochet edge would be the bottom edge of my top.  First I cut the pillow case open on the side and top to make one full piece. I found the center of that, folded in half and placed my front and back pieces on the fold of each case.  This was made using TWO pillow cases, one for the front and one for the back.  If you only have one, you can use a pretty, coordinating fabric for the back!

Here is the front cut out.  The back was cut in the same way.


I took this picture because I'm always in awe that many of these vintage items were HAND sewn as seen here.  No sewing machine.   This was one of the seams I cut to open up the pillow cases.


One thing I found when laying the opened cases out was that the side areas while they were not an actual SEAM, they were quite a bit whiter (see the lines on the left and right of the sewn seam). I'm not sure why this was but I had to take this into account before cutting out my pieces. In this case, it works perfectly and LOOKS like it was meant to be there. This is why it's important to choose your pattern, lay out your pieces and make sure everything is going to be able to be cut properly. Sometimes you may have to work around a stain or hole and you want to know that BEFORE you start cutting.


Not the greatest of pictures but you get the idea.  This tank turned out exactly as I had hoped!


I used the Peplow Juniper Tank Top which is a downloadable, printable pdf pattern.  It was SUPER easy, quick and worked perfectly with the pillow cases as my fabric.  There are lots and lots of things you can do with vintage linens.  This post on DIYS.com gives lots of cute ideas that I plan to use in the future.  Many of these will be perfect for those linens that have stains since they are small projects requiring only small pieces of the fabric.

I hope you're finding time to relax and enjoy the Memorial Day Weekend! Summer temps have arrived and I may just have to move my sewing machine out into my gazebo!


Sunday, May 9, 2021

My Dirty Old Lady


This is Helen. She's named after my maternal grandma who I never met but she was an amazing seamstress who clothed eleven children during the depression and could make anything the family needed.  Grandma I was told would get 'hand me downs' from people at church and would rework them into clothes, coats and more for her family.  I remember my mom saying that they were always dressed beautifully because of her mom's sewing talent. Helen and I go way back.  All the way to 1993 when my dad purchased her for me.  Back then, this machine cost 3,500.00!!  Can you believe that? It was the first home embroidery machine and was made in Germany by the Pfaff Company.  To this day, it is still one of the most coveted of sewing machines and it's not unheard of to see them still selling for 900-1500.00, used.  

But Helen had become a dirty, old lady.  I was hesitant to try cleaning her myself as she's electronic and I was afraid I'd ruin something.  Then I read about Carole at From My Carolina Home and her tutorial on Pfixing the Pfaff (Yes, Pfaff is pronounced Faff!).  Carole gives a wonderful step-by-step tutorial on cleaning this machine so I took the plunge!


My, my, my . . . Helen had been dishing dirt for quite awhile it appears . . .


Just look at all that nastiness!  Following Carole's instructions, I had removed the covers on top and side and began cleaning. I used my vacuum (I think here would be a great place to use one of those little computer/keyboard vacs!), pipe cleaners, nylon brush and tweezers to begin cleaning Helen up.


The pipe cleaners were great for getting down inside and around gears, etc.   Look at all of these little threads that were caught up inside!


After oiling the parts that Carole recommended, it was time to step back and admire this spiffy gal!


What a difference, right?


Beautiful inside AND out!  

Thanks Carole at From My Carolina Home!


Wednesday, April 21, 2021

DIY Pressing Ham, Part 2


Pressing hams are one of those sewing tools that you tend to think you can do without.  But once you use one, you realize they're a pretty handy thing to have and you can make them quite easily.  Last week I made this long, narrow one that is great for sleeves or seams in tight spots, baby sleeves and cuffs and on and on.  This week I made this nice, chunky one that is great for pressing darts or curves on necklines, armholes, the tops of sleeves etc.


I started with two different size plates and traced them to create the width of each end of my ham.  However far apart you place them, that's how long your ham will be.  After you trace the two circles, draw a line connecting the two to get your shape.


Cut two pieces of muslin or other fairly sturdy cotton. I just used this printed cotton because it's thick and what I had on hand.  Cut one piece of flannel or wool for the top of the ham and a piece of cotton print for the bottom.  You could totally use the flannel/wool for both sides if you want.  You can skip the cotton lining but I don't recommend it because you will be filling this very tightly with wood shavings or sawdust and you don't want anything leaking or poking out of the ham.


Lay your pieces down as described above. It doesn't matter which side is up or down for the lining as it won't show.  The only ones that matter are your flannel and the cotton print.


Now stitch these layers together leaving a gap of about 3-4" on one of the straight sides.  After I trimmed my seam to 1/4" I used a tight zig-zag stitch around edges to prevent fraying and help make this more durable.


Turn your ham right side out and press.


Now it's time to stuff your ham!  Typically hams are stuffed with sawdust.  You can probably get this for free from a lumber yard or home depot but I decided to use rabbit/hamster bedding which is just wood chips. You want to make sure you get chips that are very small and fine - you don't want big shavings.

I put my ham in a large box lid to help contain the mess which is inevitable when you stuff this.  You need to REALLY fill the ham well and tightly.  Keep poking, pressing, filling, adding until you just can't squeeze in any more.  

Once it's full, you are going to just hand stitch the opening. I suggest using a heavy duty button or quilting thread.  You are going to be yanking and pulling this very tightly and regular thread will tend to break.


Once you're finished you can use a lint roller or tape to clean off the ham and remove wood shavings from outside.  I've already used both of these so much, I can't believe I went without them for so long!


The long ham was great for getting these little cuffs nicely pressed.


These little sacks are so great for babies. My kids use them anytime the baby goes down for a nap or at night time.  Keeps him nice and cozy and warm.  These are a lighter weight fabric that they can use in the summer.

What projects are keeping you busy these days?