Saturday, November 24, 2018

Vintage Linen Mitten Ornaments


While making my mitten banner from vintage linens, I decided I'd enlarge the mitten pattern and make some individual ornaments.  I love vintage linens and this is a great way to use them, especially if they have stains or holes.  You can still preserve the beauty of the stitching and designs by making small projects with them.


Try to incorporate the pretty edgings as well.  I cut them apart and created the top edge of the mitten with several different ones.  Then make a 'sandwich':  Right sides together of the mitten  front and back (include the band you created on top of the mitten front piece) and on the back add a piece of interfacing to add stability and stiffness to the ornament.


I stitched using a 1/8" seam.  Clip all of the curves. This makes your mitten lay nice and flat.  Turn to outside and press.  Then fold in the top edges, insert your ribbon for hanging, pin and stitch through all thicknesses.


There are lots of ways to embellish the ornament.  I used several medallions of doilies I had cut apart.  You can stitch these on or use hot glue.  To add a little dimension, I kind of 'gathered' up the top medallion then attached it so it stands up a bit.  I have a lot of jewelry I got when my mom passed away that is not 'my style' so this is a wonderful way to use those pieces.  These pieces are all from one very sparkly, large necklace :) which were attached over the medallions with hot glue.  


The rosette was made from a piece of scrap fabric from a tablecloth.  Use a long, basting stitch and stitch the entire length of the piece.  Pull to gather and then roll into a rose.  Stitch the bottom edges to hold it all together.  Then hot glue to the top of the medallion.


You can see you don't need a lot to make these and the possibilities for embellishments are endless!


Don't forget to keep the scraps and edgings and small pieces . . . they can all be used!


This rosette was made from a tiny, tiny piece of a hankie edge no more than 4" long and 1/2" wide.


These are slightly addicting!  They'd make great package decorations or sachets as well as ornaments.
We are expecting our first major snowfall (although these weather people kind of get all 'worked up' sometimes so we'll see!).  Either way, winter is here so time to make the best of it and dream of warm, summer breezes . . .


Sunday, November 18, 2018

Vintage Linen Mitten Banner


While my husband was 'puppy sitting', I was able to get to my craft room and actually "Create"!  I dug into my stash of vintage linens and doilies and came up with this winter banner.
This is a great way to use linens that have stains or tears on them but still have areas with pretty designs that you want to use and preserve.  I made a mitten pattern and then traced it onto the linen pieces.
You'll want to cut a front, back and a piece of medium weight interfacing for added body and stiffness.  When using very thin fabrics (i.e. vintage hankies), I actually fused interfacing to the back of both pieces.  
Assembly for stitching:  Right sides together of fabric pieces and interfacing piece on top of either the front or back, it doesn't really matter which.  I used a scant 1/8" seam.
Stitch leaving the 'wrist' edge open.  Before turning right side out, carefully clip the curves to give a nice, flat seam.
Press the mitten.
A zig zag stitch on the edge helps prevent fraying.
These were once large doilies that I cut apart.  You can't tell in this picture but the ones on the right have a pretty, turquoise blue center.  Since I decorate with a lot of blue for Christmas, I chose linens and these doilies with blue accents in them.

The small blue and white doily medallions were folded and stitched over the top edge of each mitten.
Left over burlap scraps were used to make little pennants and the other doily medallions were stitched on top.  I also used a zig zag stitch around the edges of these to keep the burlap from raveling.
Cotton cording was stitched to the backs of the pieces to create the banner.  
I liked this but wanted to add 'just a little something' more.  Vintage ribbons would have been pretty but I didn't have enough so I dug through my stash and found a piece of a vintage curtain.
I used pinking shears and cut strips of the fabric and tied the strips in between each mitten and burlap pennant.  Being a 'winter hater', I feel like this is a good compromise.  
Mittens . . . with flowers on them haha!
I haven't started decorating for Christmas and quite honestly, probably won't do a lot this year.  With a puppy in the house, having a tree would probably be crazy so we may just put a small tree on a table in the corner instead.
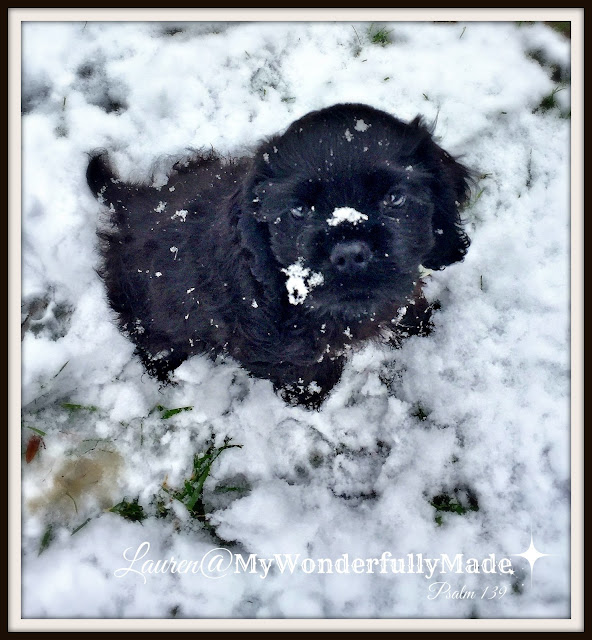
Hudson seems to like the snow (although he sure looks grumpy in this photo!).  This day the flakes were bigger than his nose and he couldn't quite figure it all out.  
So this year, I'll set aside a lot of the Christmas decorations, especially if I want them to remain in one piece!

Thursday, November 15, 2018

Puppy Update . . . Because This Is All I Can Offer Right Now

 This is it.  This is my life.  And my vocabulary has been reduced to just two words, "Hudson, NO!".  He's 12 weeks today.  He's 4.5 lbs. of cuteness. He's not the sharpest crayon in the box when it comes to potty training.  He wears me out.  


He loves the leaves and (sadly to ME) has already experienced snow.


Our version of "Where's Waldo?"


SO, until this puff ball learns some manners and realizes pooping and peeing in the house is not the norm, I'm reduced to just looking at all of the great projects others are doing and saving pins to my Pinterest boards for that one day (hopefully in the not too distant future!) when I will have a life again.