Sunday, July 22, 2018

Vintage Linen Owl


I love vintage linens! Sometimes the prettiest ones have stains that just won't come out.  Here's a great way to still get some life out of them . . . pin cushions.  When I saw this little owl, I fell in love and knew it would be perfect for this fabric I have.  The free pattern can be downloaded HERE.

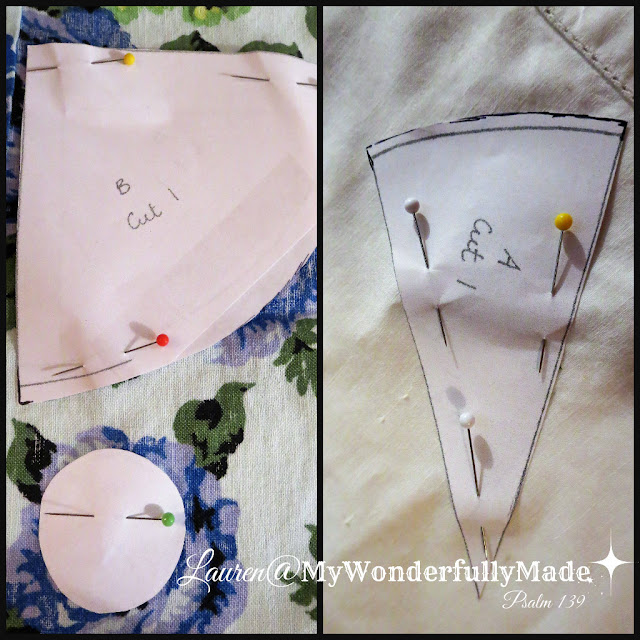
Using the pattern provided, I cut out the pieces: The quarter circle is the body, the circle is the bottom and the triangle is the belly.  I used vintage curtain material for the body and this pretty embroidered runner for the belly because it was too stained to use for anything else.


I made sure to center the embroidered flower bouquet so it would be centered on the owl's belly.


You need to cut a circle of cardboard and a circle of fabric (the fabric circle is cut 1/2" larger).  With needle and thread, just gather and pull then stitch it so it stays gathered.


Stitch right sides together, the body and belly section.  (See that I had already stitched it WRONG . . . and had to rip it out and stitch it again!)


This fabric was unraveling a lot so I used a zig zag stitch so it wouldn't unravel.


Here it is turned right side out.


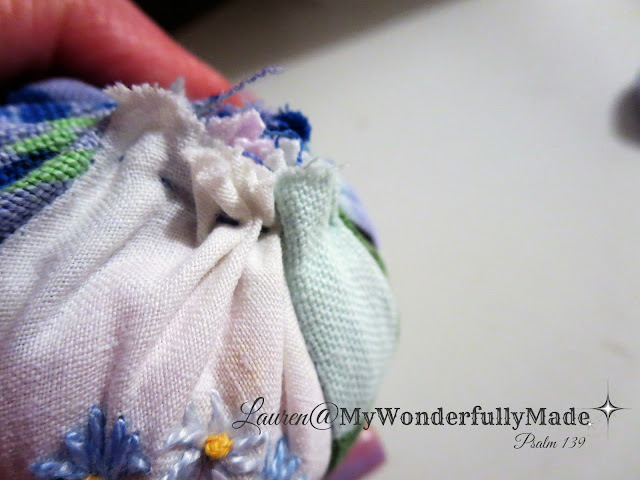
I didn't have any fiberfill so I just used some soft, jersey fabric scraps to stuff it.  Stitch along the bottom end and pull tight to hold in the filling.


Now stitch the fabric covered cardboard disk onto the bottom using a simple slip stitch all the way around.


The original instructions say to stitch the beak down.  I'm lazy.  I used a hot glue gun.


The directions also say to stitch the buttons on for the eyes.  I stitched them with the thread then hot glued them on so they LOOKED like they had been stitched on.


Isn't he so cute??


He makes an adorable pin cushion.  These would be cute for so many things!  Now I know what to do with the linen stash.  There are a lot of free patterns out there for pin cushions including these cute chicks which I think I'll try next!

Monday, July 9, 2018

SUMMER BREAK


It's summer.  And I've been so behind in attending to my blog and returning visits.  But I can't help it.  To me, 

"It's the most wonderful time of the year"

Living here in the Midwest, this quote REALLY 
says it like it is:

"I can't wait for summer.  
I hope it falls on a weekend I'm off."

Our summers are so short . . . and our winters so long that I am going to take some time now to just soak it all in, visit when I can, post if I feel like it and just generally soak up this amazing heat wave we are in!

I hope where ever you are . . . you're enjoying the beauty of the season!!

Wednesday, July 4, 2018

Weathered Wood and Napkin Wall Art


I love working with scrap wood to create art so I'm always happy when friends give me their 'scraps'.  These pieces of wood were given to me by my good friend, Rhonda.  She's rescued a lot of things from the 'burn pile' for me!


For this project I did a white wash on the wood using watered down chalk paint.  You don't need to do this but when working with napkins, I think a lighter background shows off the pattern of the napkins better.


After separating the napkin (I used the 'hand towel' size since one completely covered this piece of wood but you can certainly just use torn pieces of napkins as well.) plys, you'll have the very thin, printed part of the napkin.  I applied a think coat of Mod Podge to the wood, laid the napkin down and applied another layer of Mod Podge.


Sometimes your wood may have holes or in this case, a groove.  Just pat the napkin into the sunken area using a small brush to fill in. Don't worry if it tears . . . that's perfectly fine!


After it's dried, simply use a sanding block or emery board in a downward motion to remove excess napkin from the edges.


I wanted a really smooth surface to paint on so I sanded several times.  This gives a really nice, weathered look.  When you're finished, people will think you painted the flowers/pattern onto the wood!  


Print your words on computer paper and adjust size. Always choose a fairly clean, simple font that you'll be able to paint.  Insert graphite paper underneath (graphite facing down onto the wood), trace and transfer the outline of the letters onto the wood.


Once it's all transferred, you're ready to paint.  I use plain, acrylic paint and a #4 round brush.  To get nice, smooth lines, dip the tip of your brush in water, then the paint and drag your brush on paper to remove excess paint.  Simply follow your lines and then fill in!


Here's a good example of sanding down so you actually have some of the white washed wood showing through.


You don't need to seal your piece but I like to since it makes it easy to wipe off dust, etc. and keep it clean. 


For this project I used Minwax Wipe-On Poly and just applied it with a clean rag.


Ready to hang artwork for just pennies and everyone who has seen this thought I actually painted the flowers on!  Uh, no.  I'm not that talented!!