Tuesday, June 7, 2016

Kitchen Verse

Directly under my sink and above the cupboard doors is a piece of wood that looks like it could be a drawer but it's really not.  I thought it would be a perfect place to add a verse of Scripture and I chose Psalm 34:8.
 I printed and assembled the image first.  Now normally I would use graphite paper underneath to trace/transfer the image . . . and I did . . . the first time.  What I found was that any place I pressed on the paper, left a smudge on the white wood that would not come off.  SO . . . I had to repaint the board and start over.  This time, I just scribbled a regular pencil on the back of the template, not trying to fill it in completely.  This worked perfectly as you can see in the third photo above.  The image was just dark enough to be able to see but no smudges of carbon.
Using regular acrylic paint and a very fine brush, dipped in water to thin the paint each time, I painted the verse on.  Now here's my dilemma.  I felt like it was too bold and stark and since my kitchen is going for that 'retro/vintage' look, I decided to sand the image so it looks as if it has worn off over time.  The photos above are how it looks now.  Below, are the contrasting photos.
What do you think?  I can always go back and repaint it so it's dark again but I decided to let it go for a week or so and see if it bugs me or I love it.  
So, opinions please:   Sanded or dark? 


On any given week (depending on how busy I am!) I love to participate in Linky Parties.  These gals put a lot of time and effort into hosting these parties so I always want to show my appreciation by directing my readers to these blogs. 

Monday

Tuesday

Wednesday

Thursday

Friday
 

Sunday, June 5, 2016

New "Potty" Bell

As part of my kitchen make over, I definitely needed to replace the original "potty bell" with something that matched the new colors and decor . . . duh.  I mean doesn't this adorable face deserve a cute, new bell?? If you've never used this method of potty training for your dog, I highly recommend it.  Ava picked this up so quickly (a day or two at most) and it sure makes it easy for her to let us know when she needs to go out.  Here is a link to a very concise explanation of the method. 
 I needed a new hanger for the bell and found this beautiful, new command "hook"/knob at Target.  It was 4.99 for one but I think so worth the extra to have this finished look.
 I just used scrap fabric from the other kitchen projects.  I had the red bells from a Christmas project and thought they added a fun touch.
 Excuse the blurry photo -- Ava did NOT want to pose with her new bell! But you get the idea -- no matter where we are in the house or what we are doing, she can let us know it is time to go! 

On any given week (depending on how busy I am!) I love to participate in Linky Parties.  These gals put a lot of time and effort into hosting these parties so I always want to show my appreciation by directing my readers to these blogs. 

Monday

Tuesday

Wednesday

Thursday

Friday


Wednesday, June 1, 2016

DIY Stone Countertops

 I'm in the "home stretch" of my budget kitchen makeover.  I told you earlier that it was my girls who got me moving on this long overdue project.  They did the initial paper stripping, priming and painting.  I've been so busy with projects in this space and I'll show you more of those later but right now I HAD to share my "new" countertops.  After lots of research, I decided to go with the Daich stone kit, mainly because of the fact that it's actually ground stone you are applying and not just paint.  The reviews were all super positive so I purchased a kit online for $120.00 (a mere fraction of what it would have cost to have new stone countertops installed!).  The kit truly DOES come with everything you need except the few obvious, little things like painter's tape, drop cloth, etc. You also get VERY detailed printed instructions but better than that -- you also get an instructional DVD.  In less than 48 hours the job was painlessly finished!
You begin by taping everything off -- simple.  Then you need to really rough up the surface with the sand paper included in the kit.  It's really important then to completely remove any dust particles.  I took a little extra step and used tack cloth to be sure there was nothing left behind after sanding.
The first step is applying the base coat.  It's super thick and using the brush and roller/tray provided, you apply two coats and you only have to let it dry for 30 minutes in between coats.  The color of the base will depend on the color kit you've purchased.  My kit was the "pearl" which is white with gray and black stone 'flecks' in it so the base was a medium gray.  
Once the base coat is dry, the real fun begins when you now apply the stone coat.  You really have to work at stirring this well because all of the stone is on the bottom of the can and you want it evenly distributed.  This part has to dry for 24 hours but you can sand in as little as 4 hours, which is what I did.  Using a vac is pretty important here and I also used the tack cloth to remove all of the dust.  The second day I applied the clear coat.  You apply two coats of this waiting a few hours in between and that's it!
And the difference?  Well, it's astonishing to say the least!  This product does EXACTLY what it promises . . . see for yourself!
I did use my grinder attachment on my sander to smooth down that front edge but the stone really filled it all in.
Can you believe it!?  You do have to wait 24 hours before you begin using the counters and they suggest light use for the first 7 days but after that -- maintain and use as you would any other stone countertop.  Now, on to the floors . . . 


On any given week (depending on how busy I am!) I love to participate in Linky Parties.  These gals put a lot of time and effort into hosting these parties so I always want to show my appreciation by directing my readers to these blogs. 

Monday

Tuesday

Wednesday

Thursday

Friday
 

Monday, May 16, 2016

Coffee Lover Appreciation Gifts

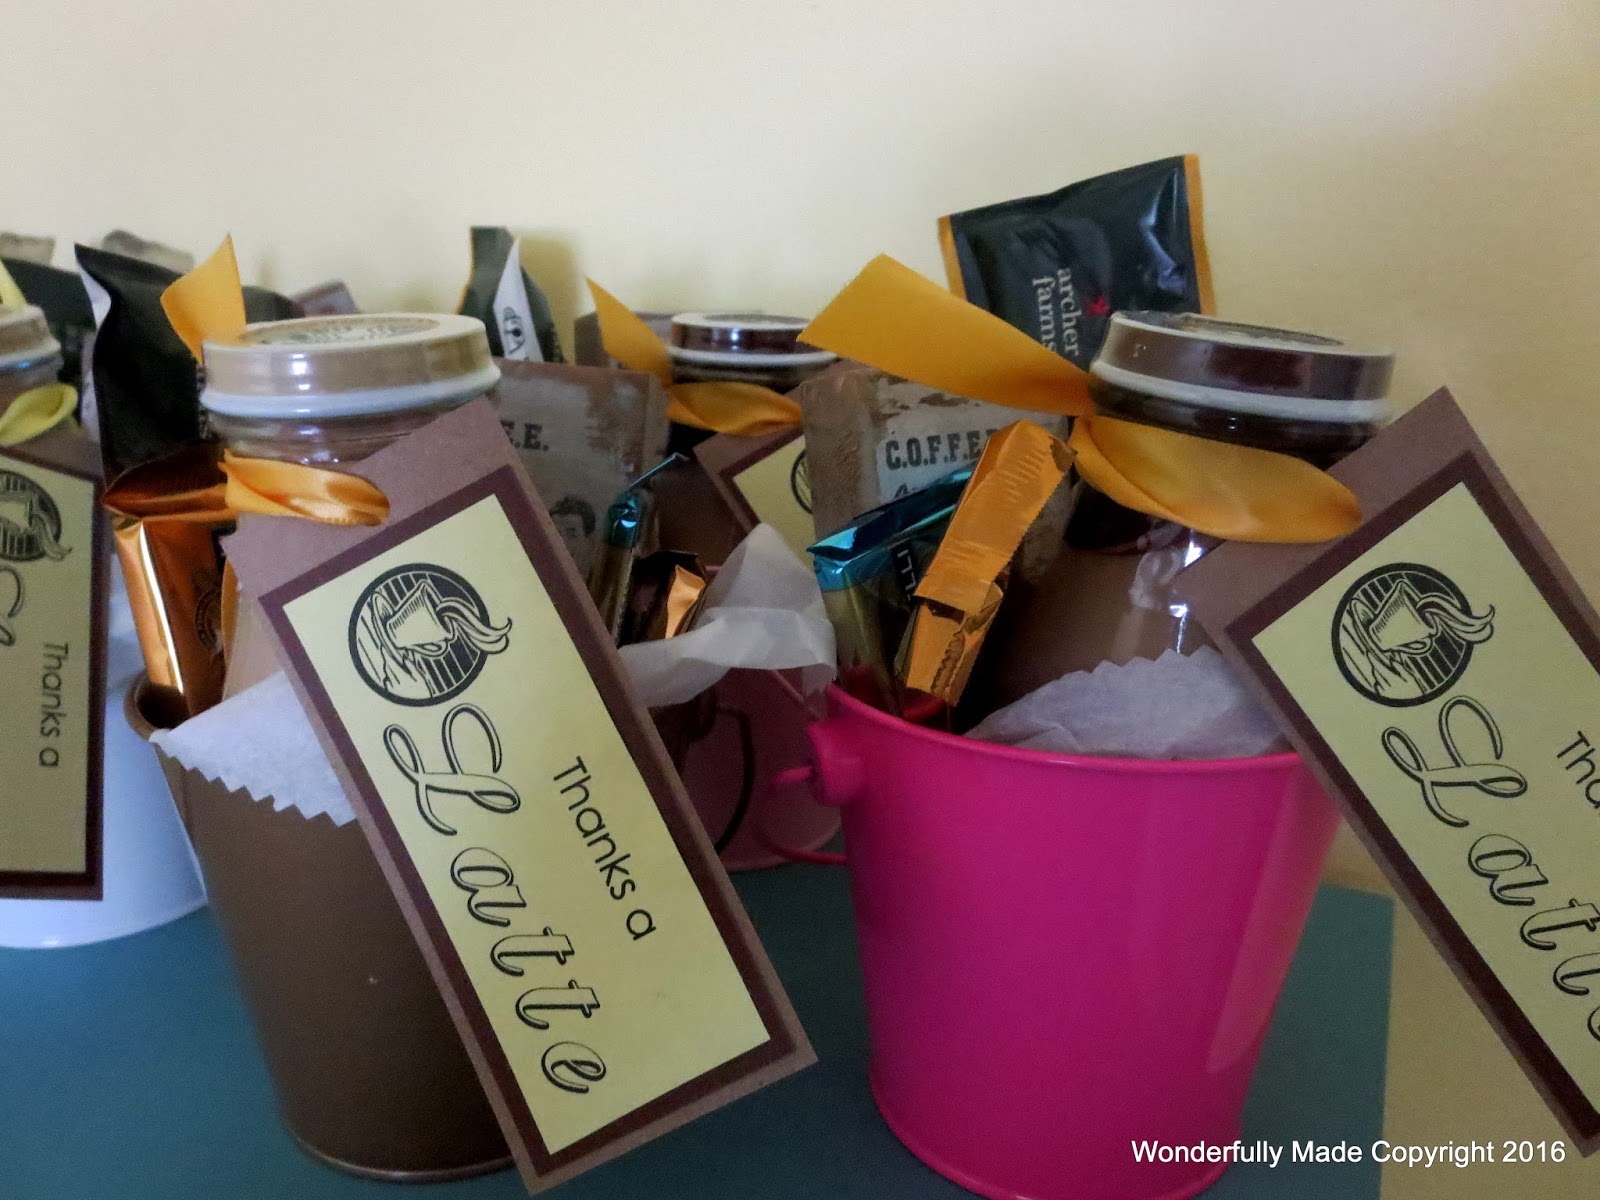
I am blessed to work with an amazing group of people who serve with me every Sunday teaching 3rd and 4th graders at our church.  This coming Sunday we will have our 'end-of-year' celebration before breaking for the summer and I wanted to give them all a little something to show my appreciation for their faithfulness.  We are all a bunch of coffee addicts lovers so I thought that was a good theme.
 I picked up these cute, little metal buckets from Target to put it all in and lined them with tissue paper.
 I started with bottles of Starbucks coffee drinks.
 I also slipped in a package of these instant coffee mixes as well as a few pieces of chocolate . . . DUH.
 As a final addition I made these refrigerator magnets using my scrap wood.  I've seen this cute saying on the internet so I thought it would be a fun gift.  Interestingly we have MORE men than women on our team so it was a challenge to think  of something that the guys would enjoy.  I'm not sure they'll be all that excited about a refrigerator magnet but maybe their wives will be!
 I love everything 'retro' so I added the clipart.  One for the guys. . . 
 And one for the gals . . .

 What kinds of gifts are you/have you given to those you serve with?

Monday, May 9, 2016

Daich Countertop Refinishing Kit

If there was an award for the ugliest kitchen -- I'm pretty sure I'd have a really good chance of winning!  We have lived in this house for nearly 20 years and I have hated the kitchen since day one.  The house was the church parsonage for 15 of those years but 5 years ago they agreed to sell it to us and thus began the slow, steady process of fixing things up.  Renovations as you know are expensive and most things don't fit into our budget so creative renovation has been my "mantra".  Recently our twin daughters were home for a few weeks and they spear-headed the kitchen makeover.  I'd had a vision for years but not the ambition to tackle it -- but THEY did.

They dove right in and in their cute, little outfits (sorry dad!) began the project by removing the wallpaper border, priming and painting the walls.
 I removed all of the cupboards and drawers and they put the first few coats of white paint on the cupboard frames (more about THAT whole process to come later!)  Just a small hint -- I LOVE chalk paint -- but NOT for painting laminate kitchen cupboards WHITE.  But I digress.  I've now finished the cupboards (pics to follow soon); replaced all of the hardware; brought in my vintage kitchen set (the inspiration piece for the entire project!) and am now ready to tackle the hideous counter tops.

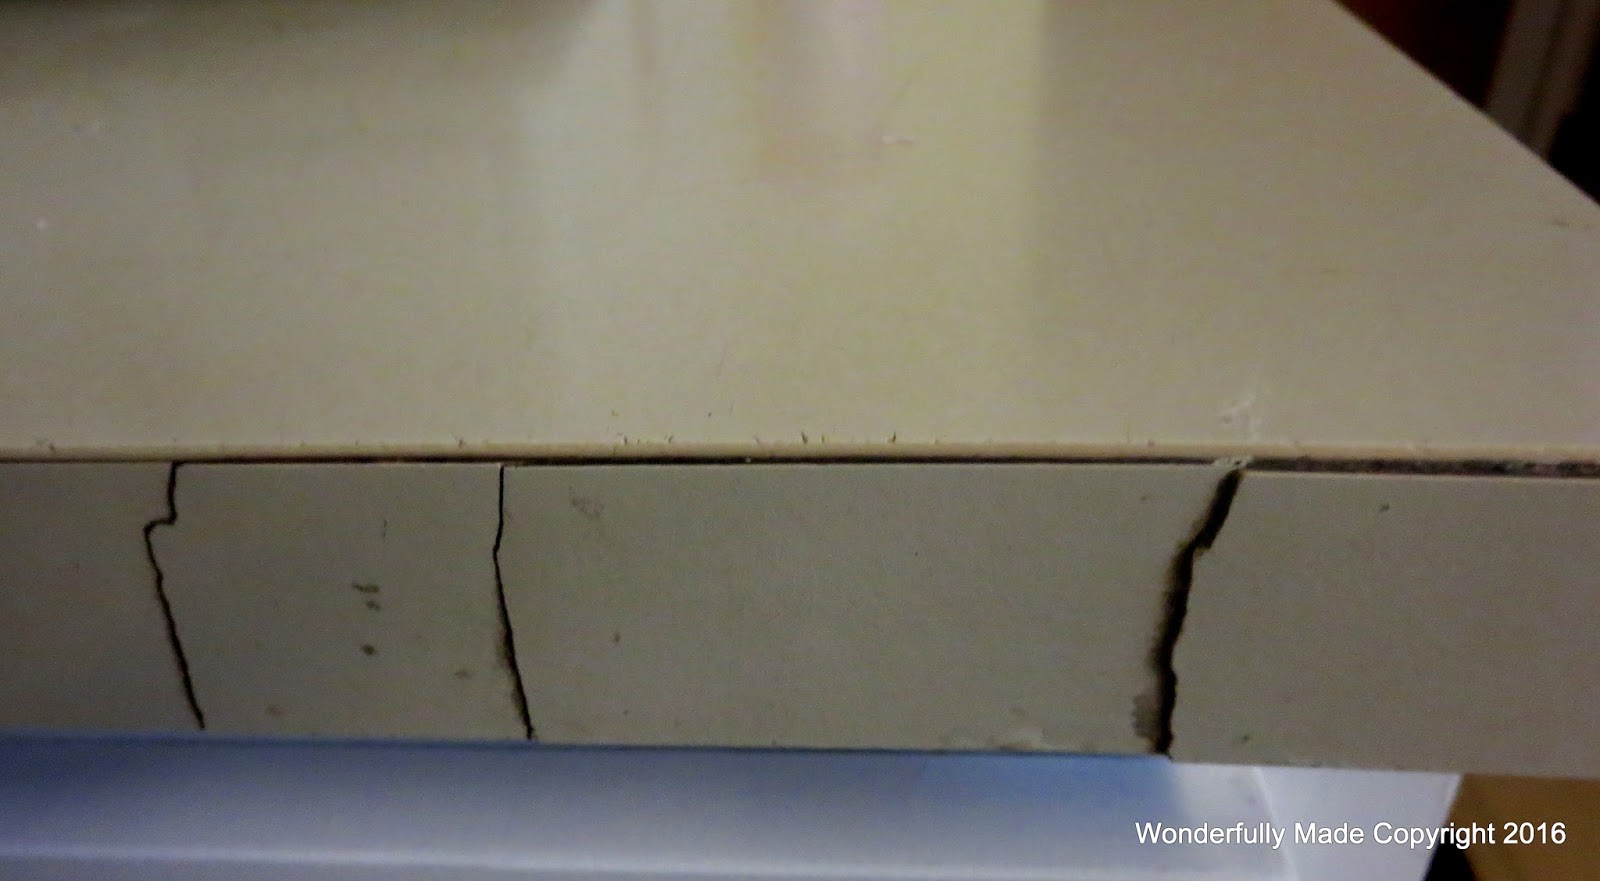
 Aren't they pretty?  I don't think they were EVER attractive!
 And what the heck??  Who considers this an acceptable way to finish the counter top edge??  Well, I'm hoping to kiss all of this sadness good bye with the help of a Daich Spreadstone Countertop Kit.  I did a lot of research and read a lot of reviews of various kits and decided this was the one I wanted to use.  It's actually crushed stone and I think it will offer me the best way to make over the counter tops I have.  The kit comes with everything you need (so it says -- we'll see!) as well as with an instructional DVD.  SO, I'm off to begin and I'll let you know how it goes and if indeed it is as easy as they say it is!  There have been lots of little projects that I'll be sharing with you as well . . .