If you have a Hobby Lobby store near you and you've never visited the "90% off Aisle" . . . you're missing A LOT of bargains! On my most recent trip I found this 12" tall resin letter "Z" (this letter is always in abundance in any clearance section!) and since my last name begins with "Z" . . . I grabbed it . . . for $1.00.
This is what it looked like BEFORE. (The top metal letter was marked down to 60 cents and the ceramic to 40 cents so I couldn't pass those up either!)
There was an issue though. There was a big crack that went completely through the top. But with a little bit of Gorilla Glue, followed by some wood putty and a little bit of sanding, it was pretty sturdy.
I then gave it a coat of primer and after that dried, it was ready for two coats of Behr Perfect Pearl paint which I applied using a sponge brush.
The cracked area was still a little bit unsteady so I decided to take some twine and wrap the "Z" in different areas and where the crack was, made the twine extra tight and that did the trick!
I'm pretty pleased with my $1.00 letter that is going to go in a new grouping in a recessed "nook" I have in my living room that is looking rather bare. I'll post pictures of it when it's complete!
Saturday, March 26, 2011
Friday, March 25, 2011
"Hymns/Music and Shelves Wall" -- Complete!
After much 'trial and error' the pediment shelves and hymn/music collection are up on my dining room wall! The metal bicycle was there (minus the ivy) looking very lonely and forlorn so it's very happy to have company.
I needed one more "piece" for the shelves so I got this cute little frame for 1.00 (which was originally white), painted it black and added the quote fromMartin Luther . The metal "nest" tealight holders I had and painted them black adding little pearls with gorilla glue.
Originally the frame on top with all of the Bible verses featuring the word "Sing" was white but I decided it looked better black so I painted over the white. The little ceramic bunnies were $1.00 each at Hobby Lobby and I couldn't resist them. They were meant for Easter but gosh, I don't know -- maybe they'll live there all year 'round!
Here are the tealight holders BEFORE. The little vase I haven't found a spot for but I'll show you what I did with it too.
Here you can better see the pearls. These were from an old necklace I had that broke so I saved all the pearls.
I kept the mini vase the same because I already love the finish but the green velvet ribbon didn't work for me. I took fine beading wire and more oldbeads I had and created this beaded handle.
Here's the handle "in progress" -- really simple and takes just a few minutes!
Well, that's one "empty" wall down and a few more to go! Total cost for this was not even $8.00 -- Woo Hoo! Back to work!
I needed one more "piece" for the shelves so I got this cute little frame for 1.00 (which was originally white), painted it black and added the quote from
Originally the frame on top with all of the Bible verses featuring the word "Sing" was white but I decided it looked better black so I painted over the white. The little ceramic bunnies were $1.00 each at Hobby Lobby and I couldn't resist them. They were meant for Easter but gosh, I don't know -- maybe they'll live there all year 'round!
Here are the tealight holders BEFORE. The little vase I haven't found a spot for but I'll show you what I did with it too.
Here you can better see the pearls. These were from an old necklace I had that broke so I saved all the pearls.
I kept the mini vase the same because I already love the finish but the green velvet ribbon didn't work for me. I took fine beading wire and more old
Here's the handle "in progress" -- really simple and takes just a few minutes!
Well, that's one "empty" wall down and a few more to go! Total cost for this was not even $8.00 -- Woo Hoo! Back to work!
Wednesday, March 23, 2011
Funky Clothespin Magnets
I love to browse "high-end" gifty-type stores and see what I can duplicate for way less than they're charging. A few months ago while browsing such a shop with friends I saw these adorable magnet clips being sold for a ridiculous price and thought, "I can do that!".First I gathered pretty papers (This is a GREAT way to use up small pieces of scrapbooking paper!) which would help me determine what color I was going to spray paint the clips. I decided black was pretty safe to use with anything although I did use silver on some clips that had silver accents in the paper. I put the clips in a cardboard box and sprayed several times, rotating, turning, etc. until all surfaces were covered.
I cut the papers slightly longer than the length of the clothespin so I could wrap the ends inside of the clip and applied with Mod Podge. Once dry I coated each with a few layers of Mod Podge to seal and give a nice, finished look. Finally, I added gems, pearls or other accents and a magnet to the back. (Hint: Get the teeny, tiny, super strong mini magnets for a very reasonable price on Ebay. Much better than the thick, black ones you'll find in most craft stores.)
Since I was giving these as gifts, I created little cards using the same papers and clipped 5 clothespin magnets to each card. Great to have little gifts like this on hand to give as hostess gifts when invited to a friend's house for dinner, etc.!
Tuesday, March 22, 2011
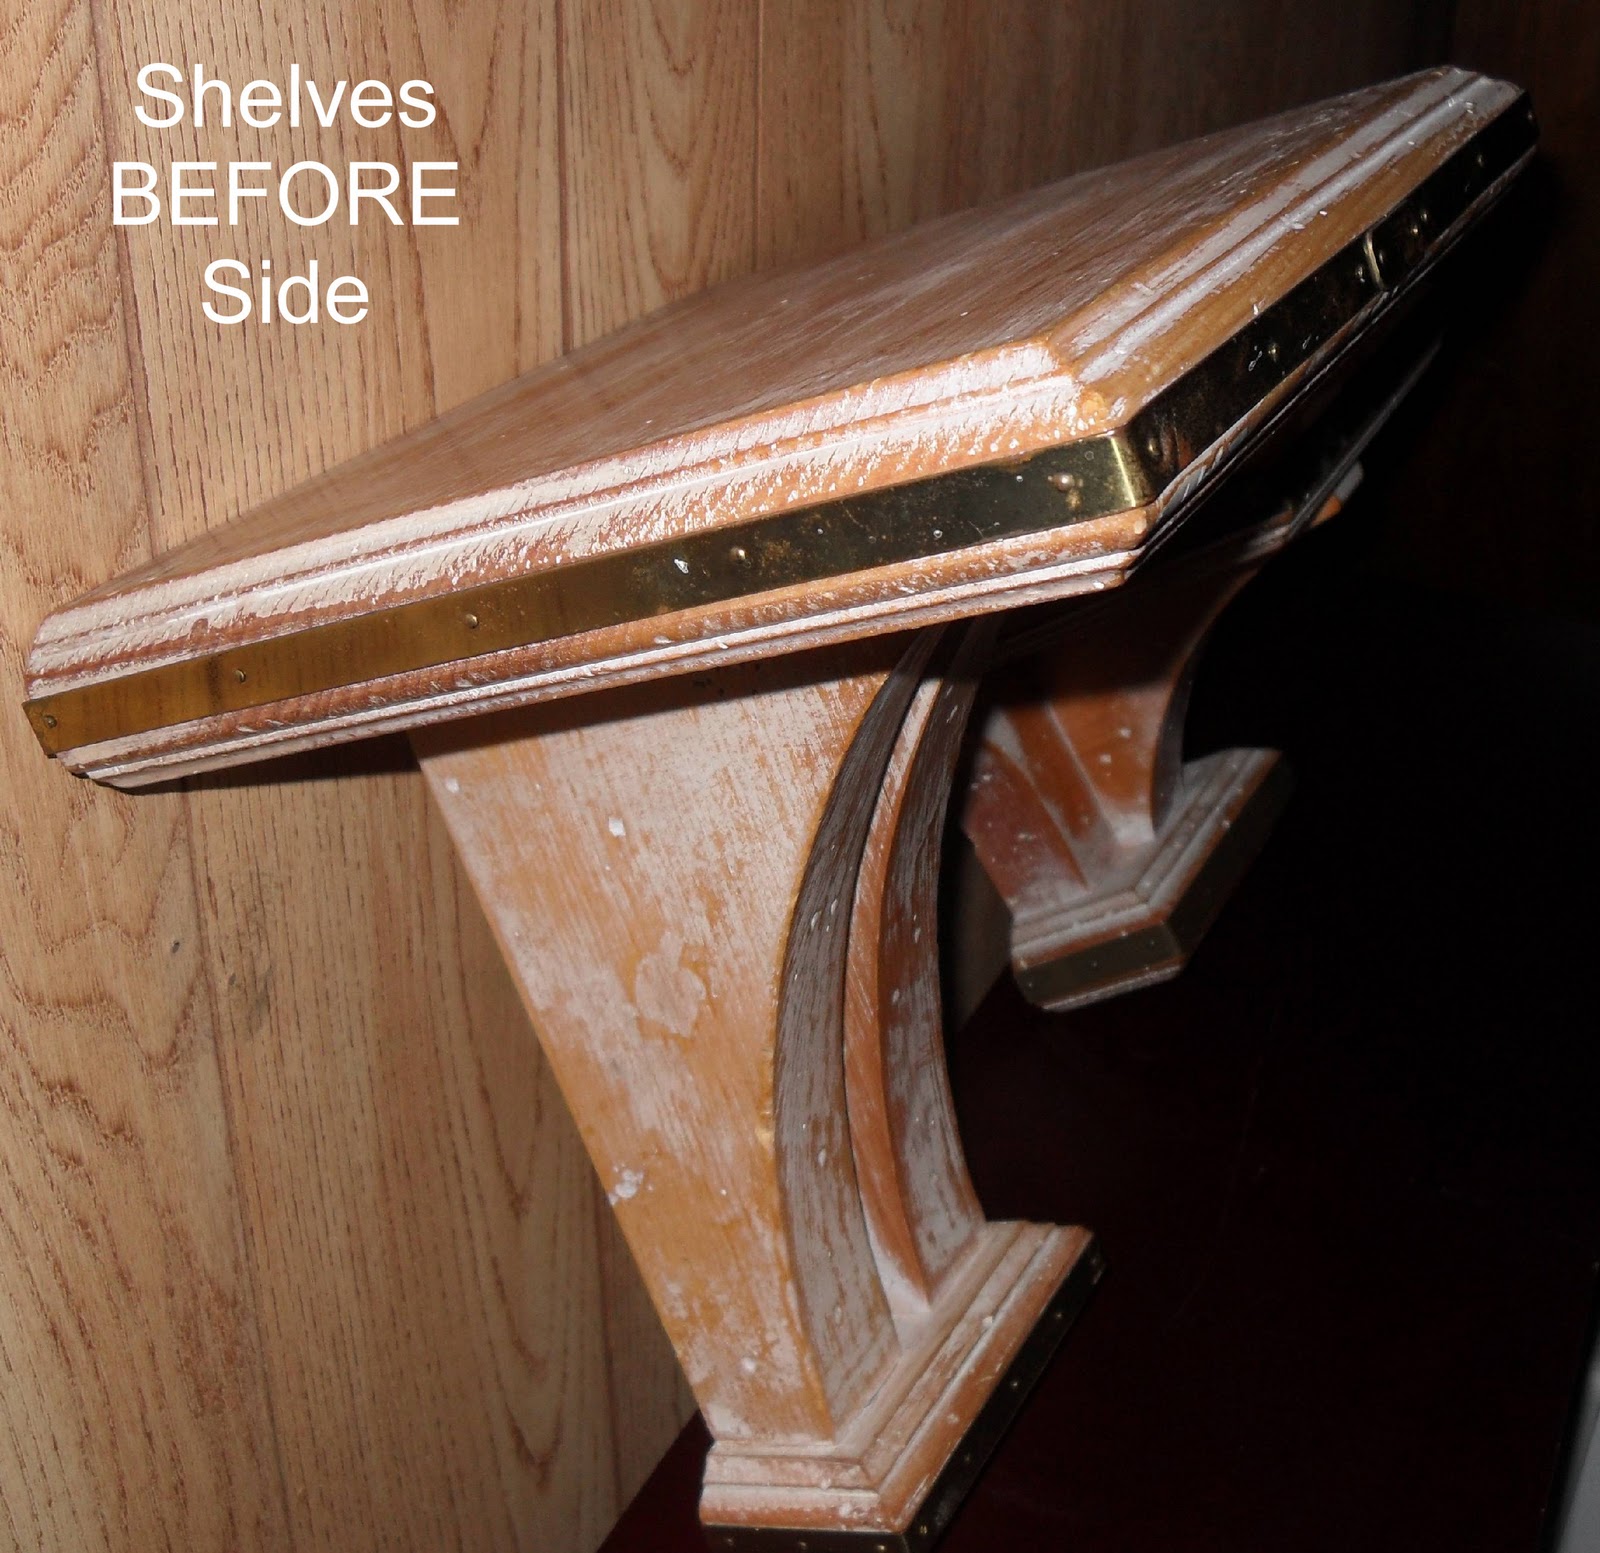
Pediment Shelves Revamp
I've known for awhile that I needed to come up with SOME shelves to replace all of the ones I got rid of when I redecorated my living / dining room. I found these at our local thrift store. 
The larger one was marked $3.00 and the smaller $2.00 but it was 20% off day again so my total cost was just a little over $4.00 with tax. Now these girls are HEAVY, solid wood and have lots of great distressing/worm holes in them already but I had a plan that first of all included removing the metal stripping. Easy enough with a screwdriver -- prying out the brass nails (which I kept for any future projects) and pulling it all off.
I then had to fill in the nail holes and my 'go to' for that is Elmer's Wood Filler. I just rub it into the holes, smooth it out and wipe off the excess. You let it dry (usually only takes about half an hour) and then sand lightly. (I used the Scotch sanding pads for this because there isn't much to remove -- just needs smoothing out.)
Once all the holes were filled and smoothed out (Note: I did NOT fill all of the 'worm holes' in the shelves -- that would be silly since they give it so much added character!) it was "time to prime". I used Rust-Oleum white primer and gave each shelf two coats. Hint: To keep paint from floating everywhere, I use a large cardboard box to lay the pieces in and spray. And now, I was finally ready for two coats of Behr Pearl White paint.
Once the paint was dry I sanded with 80 grit sandpaper to distress the pieces, wiping them down after with tack cloth to remove any dust or wood particles. This was followed by wiping on a coat of stain (I used Varathane Pecan stain just because that's what I had!)
I wear disposable rubber gloves and use a clean rag to wipe on the stain and then wipe it off with another piece of rag. The longer you leave the stain on, the darker of course it will remain. I did these in small sections and wiped off immediately because I didn't want a lot of stain on them -- just enough to really bring out the distressed areas and add a bit of an aged look to them.
Finally, I finished off with just one coat of polyurethane because these will be hung up on the wall and won't need any more protection than that.
I think these are going up on my dining room wall along with the hymns I collaged and framed. I'll post pictures soon!
Monday, March 21, 2011
Frames, Frames, Frames, Part 3 (and Final) (For Now)
REALLY, I intend for this to be my last post on "Frames". At least for awhile. Since I gave away the tiny frame with the Bible verse on it, I needed to replace it with another. I didn't have another tiny frame (hard to believe!) so I decided to just print out a bunch of Bible verses that spoke about singing! Now I'm getting ready to add this to the grouping but I'm waiting until I finish the really great shelves I picked up at the thrift store the other day. Once I'm finished arranging everything -- I'll post pictures!
Subscribe to:
Posts (Atom)